

Install a DHCP Server in Ubuntu and Debian
Before you start
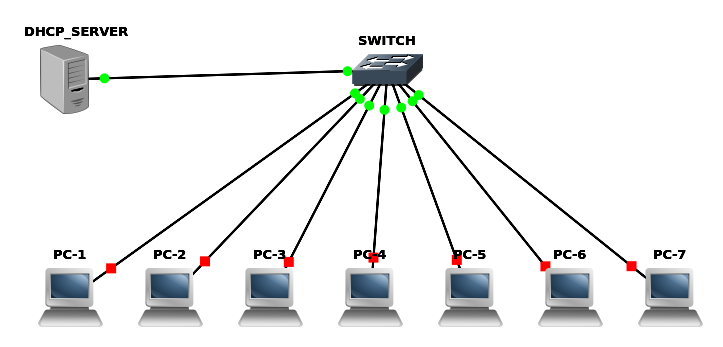
Understanding working of DHCP
DHCP stand for Dynamic Host Configuration Protocol, which is used to provide IP addresses of a specific range to client or user of our organization. DHCP used port 67/68 of UDP. So, now we will configure it step by step. Follow the following instructions to configure it in your machine.
Steps to configure DHCP Server:
Before installing ISC-DHCP-SERVER, we have to update our system :
sudo apt-get update
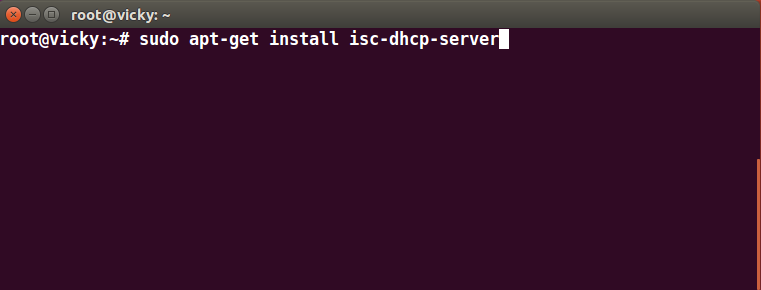
Now install ISC-DHCP-SERVER
sudo apt-get install isc-dhcp-server
Now configure our Network Interface with static IP:
sudo nano /etc/network/interface
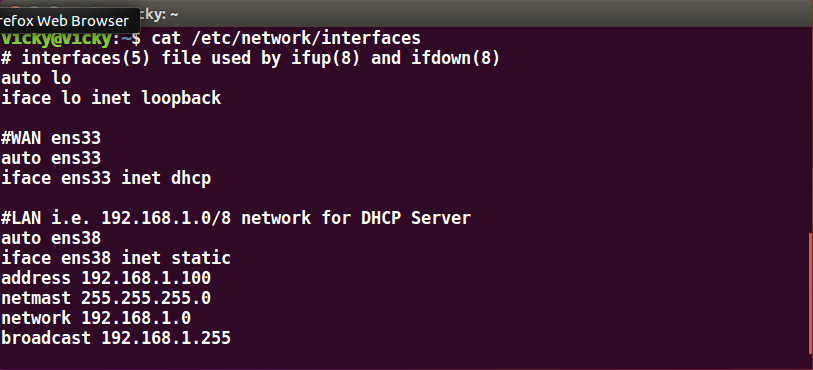
auto ens38
iface ens38 inet static
address 192.168.1.100
netmask 255.255.255.0
network 192.168.1.0
broadcast 192.168.1.255
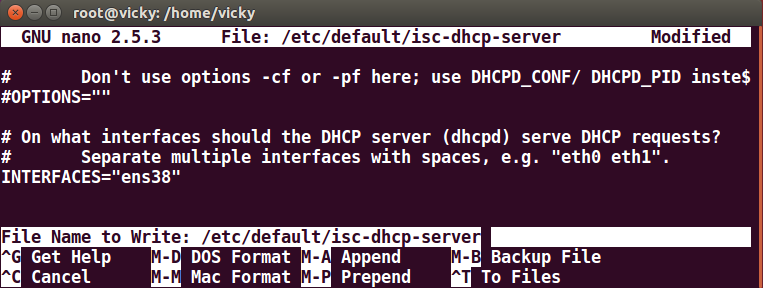
Now, define this interface to listing dhcp discover messages :
sudo nano /etc/default/isc-dhcp-server
Now, configure /etc/dhcp/dhcpd.conf file, and define all the parameters which is used by DHCP service.
sudo nano /etc/dhcp/dhcpd.conf
option domain-name "www.learn-networking.in";
option domain-name-servers ns1.learn-networking.lan, ns2.learn-networking.lan;
default-lease-time 3600;
max-lease-time 7200;
authoritative;
subnet 192.168.1.0 netmask 255.255.255.0 {
option routers 192.168.1.100;
option subnet-mask 255.255.255.0;
option domain-search "VIKASH KAUSHIK";
option domain-name-servers 192.168.1.100;
range 192.168.1.10 192.168.1.100;
range 192.168.1.110 192.168.1.200;
}
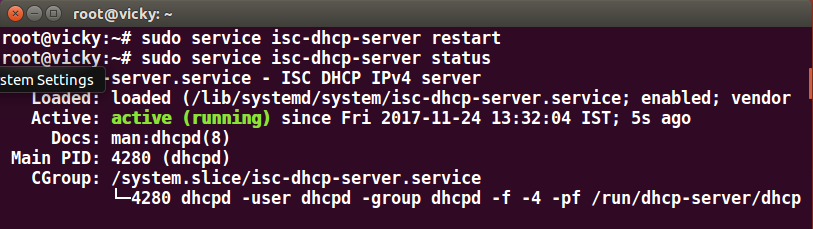
Now, restart the service of DHCP and verify our service is working or not:
Now, we have done our configuration and have to check the configuration status. We will find DHCP server status from following commands:
sudo service isc-dhcp-server restart sudo service isc-dhcp-server status
Finally, we verify DHCP on our client machine (i.e. Windows XP).
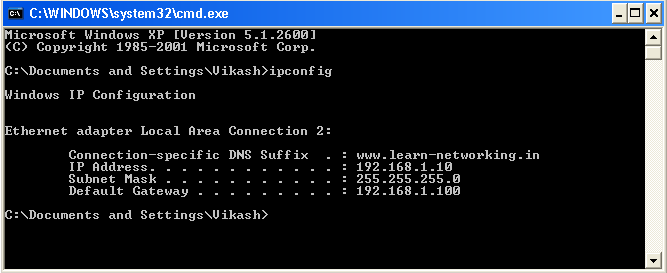
Hence, our Linux DHCP server works fine and it deals with all the client which request for IP address from it.
sudo service isc-dhcp-server restart sudo service isc-dhcp-server status
Finally, we verify DHCP on our client machine (i.e. Windows XP).
Hence, our Linux DHCP server works fine and it deals with all the client which request for IP address from it.


No comments:
Post a Comment